Saturday, December 13, 2014

A Brief History of Time

There's a certain feeling you might know when you step into an old house.  It's not the draft from bad insulation or the smell of a musty dirt-floored basement.  It's not the the awkward feeling you get looking at goopy layers of paint or wavy plaster walls.  It's not even determined (as I have argued and will often argue) by the proportions of the trim or the height of the doors.  It has to do with history. 

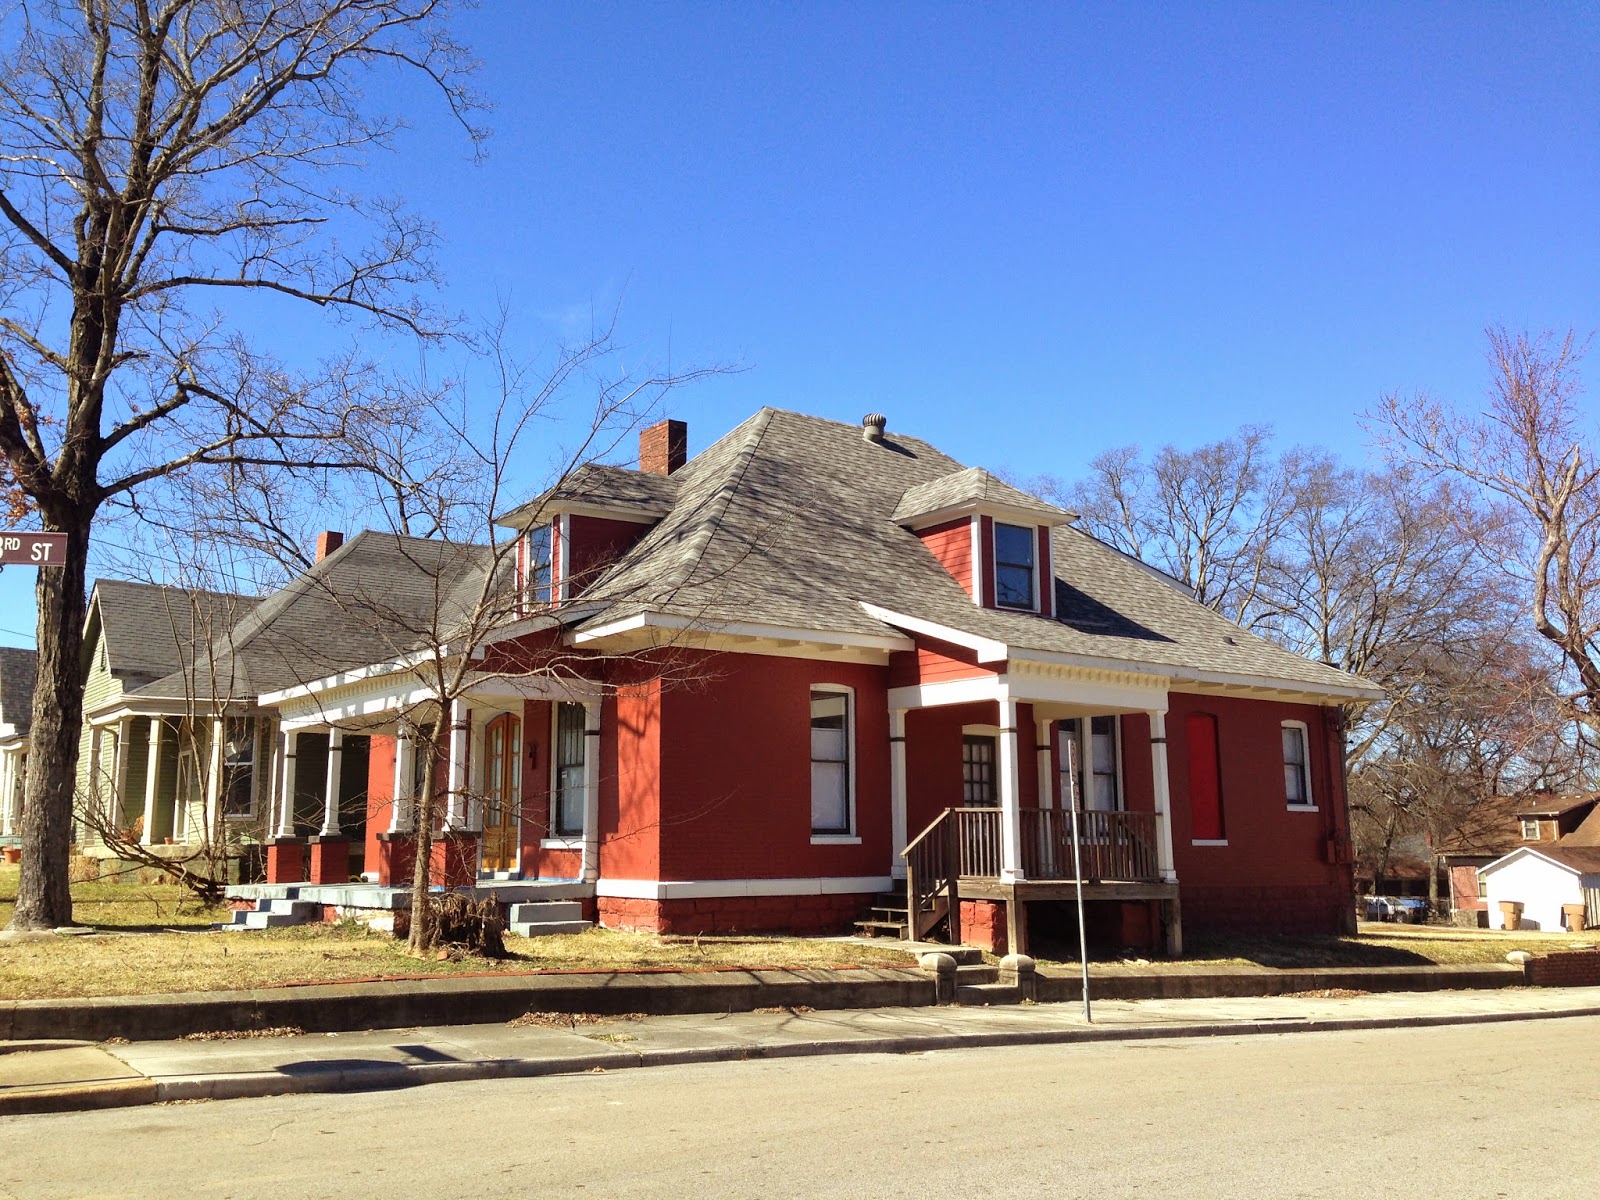
An old house is packed with secrets, filled with memories.  In every crevice, in every time-worn crack, are the minutes, the seconds, the stories of other people lives'.  All the days that passed in birthday cakes, in Sunday dinners, in sneaking out, in crying babies, in tears and laughter and love - those days happened here.  The most basic and most intricate weavings of human lives into the passage of time happened here.  I'll never see them.  But our house has. 

And so I'm convinced that it's not fancy woodwork or towering ceilings that makes a house so inviting.  It's the history insulation, if you will, the packing of so many memories into its walls, that keeps it warm.  Don't you wonder even you walk through the front doors of an old home, who walked here before me?  Who danced here before me?

This doesn't mean I'll settle for anything less than classically proportioned trim, however.  [<---Did you see that, Mom and Dad?  It will fit into our budget even if that means leaving something out...something of Todd's, of course.  Hehe.  I kid, I kid.  Now back to our regularly scheduled programming...]

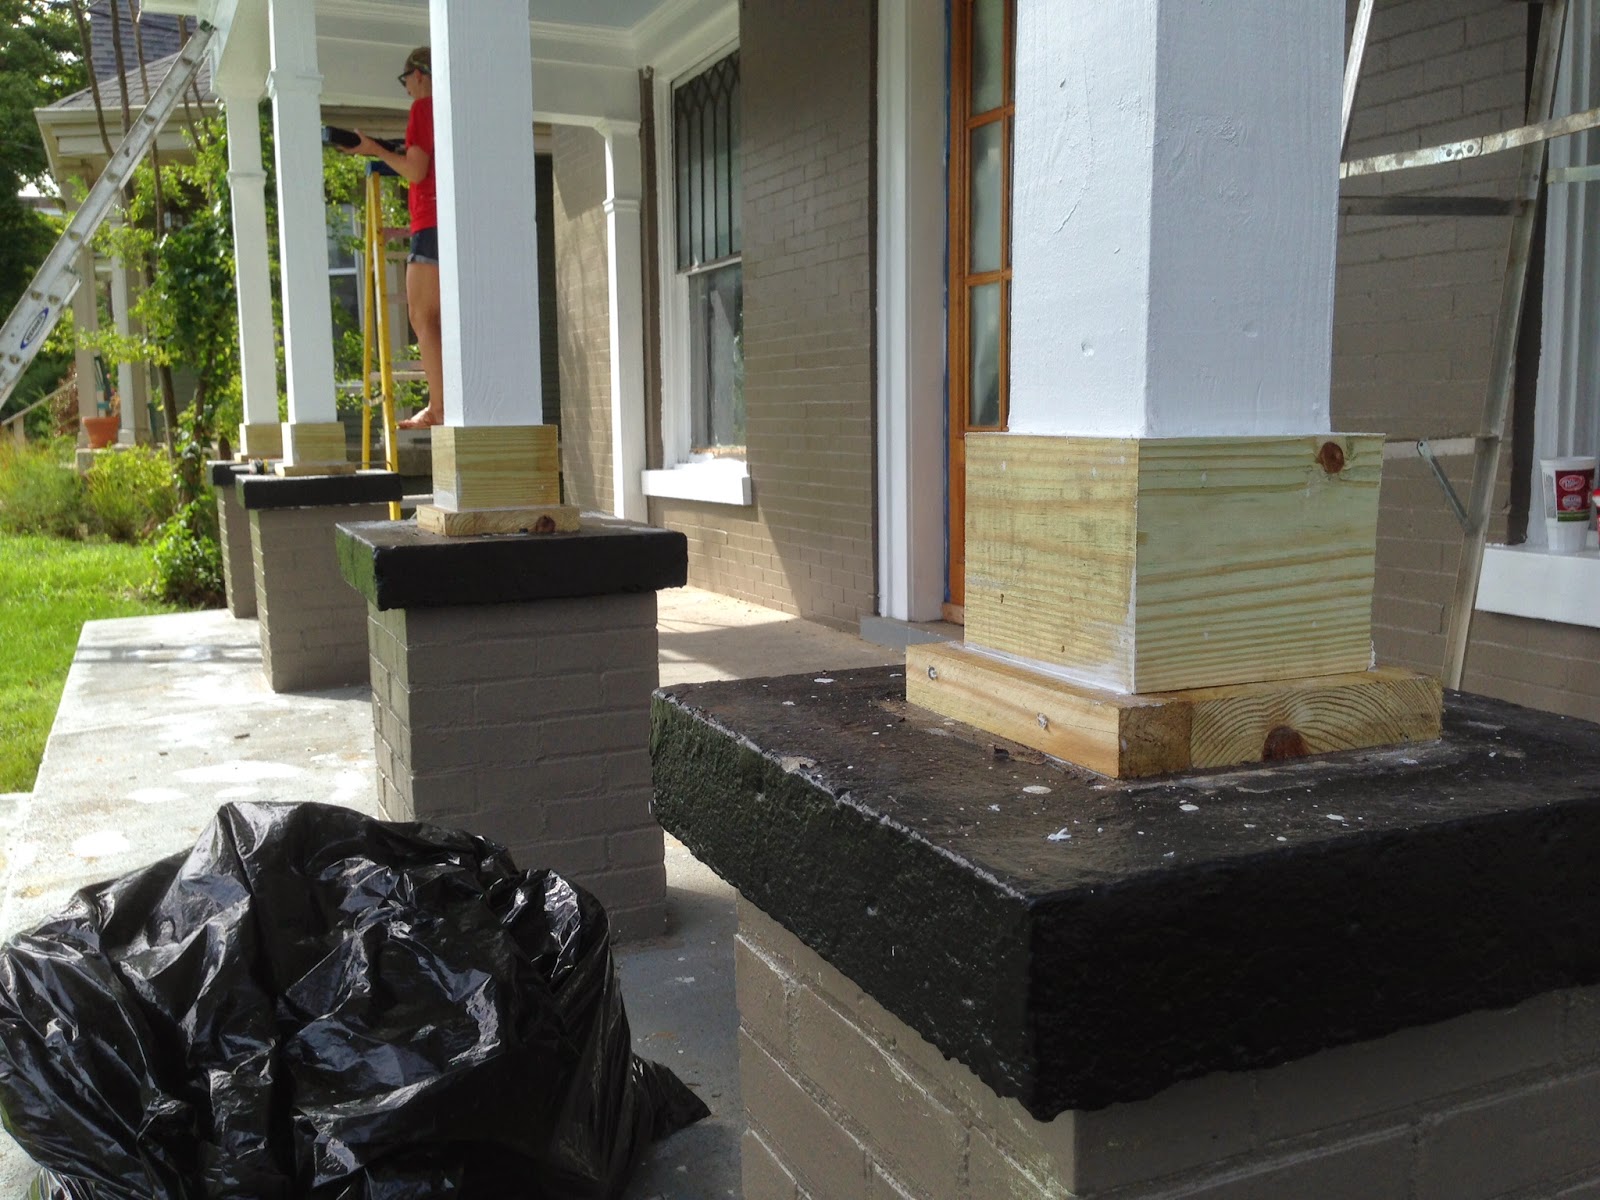
Now we could spend our time in the house just wondering, just imagining the lives before us.  We could dream and ponder and piece together.  Or, better yet, we could get a little light on the Cleveland's first 100 years.  Lucky for us, one of the house's previous occupants contacted us when we first began work on the house this June.  Ms. Judy, as she is known, is the one of the sweetest and most fantastic people we have met since starting this whole thing.  We were first introduced when she stopped by one afternoon while Todd was busy staining the back deck.  It turns out, this was Judy's childhood home, and when she saw that someone had finally bought and was beginning to the restore the place, curiosity got the best of her.  She has stopped by on several occasions since and given us little details into her many memories growing up here.  It's amazing to think how fortunately we met her.  You can tell just in a few minutes of talking just how many emotional ties she has to this place, how many of her own memories are woven into its walls.  And it's fantastic that we get to hear about them.

It's also started a bit of a side project for me that involves a different kind of digging (no shovels and dirt for this one!).  A couple hours at the Nashville Public Library and a few roles of microfilm later, I've come up with a list of names of the house's previous occupants.  I've also researched through some of the area's original maps to see what went up where and when.  At this point, I'm not sure what I can do with the information, where it all will go, or what it all will do.  But the other night, some hours into internet searching, while reading the heartfelt obituary of the original owner's late grandson, I realized that maybe recognition is all they need.  Just to read about them, to know they existed, that their stories are here just waiting to welcome in our own - maybe that's what it's about.  Either way, I've got much more digging to do! 

1920 Census records

Original Nashville city map publication.  Started in 1914(?) and updated through 1930.  The cut and pasted clippings are changes made after the 1914 publication.

1918 Nashville City Directory


Sunday, November 16, 2014

Intergalactic Insulation

I'm sorry... I just had to.  That title, this suit:

Dad, from the planet Spray Foam-ia, getting ready to spray foam insulation on the exterior walls.  

Two weeks ago, we began the tedious process of insulation, otherwise known as "how not to have a $700 heating bill."  Dad, the ultimate promoter of "doing things right," has developed the most cost and energy efficient method of insulating our home using a variety of materials including foam, wood, and our every last bit of patience.  

Here's the breakdown:

1.  Wood. Using 8 inch strips of plywood, we blocked and attached cut pieces between the beams to block airflow in the ceiling of the first story. After we placed the first set of blocks on the outside, we attached another set where the second story floor meets the wall to direct air intake from outside up and out the roof rather than in and through the floor.
(Side note: anytime we move to an untouched area of the house - ie the bottom line of the roof above the first floor - we find all sorts of gross and nasty treasures including but not limited to: decades old sweaty rags, birds' nests, pieces of old packaging boxes, and tons and tons and tons of black, sooty, dirt. When you clean, you sneeze black for about 24 hours...)


2. Seafoam green foam. To seal off large amounts of airflow in the wood sheath around the outside of our house, Dad used this highly toxic yet effective spray foam to cover the insides of the exterior walls. A nasty project, but one that has already given us a little sound proofing...not to mention a quite fashionable temporary wall color (ahem).


3. Foil backed foam. This dense, solid sheet foam is backed by foil on the side that butts up to the roof allowing heat to be reflected away from the interior. Using short blocks of wood, we attached these long boards to all our exterior walls in the second story leaving about an inch of room between the roof so air and moisture can travel up and our the roof vents.  Then when we get to - drum roll, please - caulk between every crack and connection.  For the larger gaps and those we can't fill with solid insulation, Mom fills in using a spray foam.  (One of her favorite activities is getting spray foam in her hair. No...wait...I take that back. Her real favorite activity is cutting her hair to get the spray foam out. Eek!)


Next up, we'll use even denser solid foam sheets topped with a 2x4 on each wood rafter upstairs to prevent any airflow between the wood beams themselves. I told you that Dad was a thorough man! Then we'll cover ev.er.y.thing. in the old pink panther fiberglass insulation and then hopefully call it a day (or a month)!

Oh the Weather Outside is Frightful...

....Thank goodness we've moved indoors!

A cold front hit us hard this week bringing highs in the 30's and low 40's and some pretty ugly rain showers to top it off. I must say, it sure is nice to be out of the wind and rain. We're still working in 2,500 square feet of studs, but we've begun the long insulation process so the rather large (and rather loud) kerosene heater can build up a good bit of heat in that place. It's no sauna, I assure you, but our fingers aren't going numb either.

In celebration of a completed exterior, I'm just going to give you all the eye candy: photos!  But first some more reading (hehe).

First of all, painting. Ohmygosh painting. I really have to give all the painting credit to my mother who kicked some serious you-know-what painting the exterior of our house.  I may lovingly call her the paint nazi, but in all seriousness, she knows what's she's doing! Climbing ladders like a madwoman, dangling off the edge of the roof on a very dubiously placed ladder, caulking, sanding, scraping, and rolling away - the woman is a powerhouse. Her "work clothes" are a great testament to her painting capabilities - or maybe just a good illustration of how much she paints.

About a month ago, we noticed a hired gentleman doing some repair work on the beautiful but unkempt farmhouse Victorian next door. I was planting our brand new magnolia in the front yard, and I asked him a few questions, wondering if our little exterior update had motivated the owner next door. Sure enough, the next day we saw next door a whole crew of men preparing to paint, so westopped by to chat again. Mom asked them how many days it would take for them to finish the paint and not surprisingly they said three. Days. Three days. Total. In comparison, ours took weeks, months even.  I could have been disheartened, but here's the difference:  Mom then asked how many coats of paint they would do and if they would repair or replace any of the siding.  Again not surprisingly they said one coat and no repair work.  In comparison, we did three and a whooooole lot of repair work.  That owner?  She'll be paying them again in a few years.  Us?  We're not touching that paint again.  Just another lesson in how often times doing things yourself = doing things better (Dad's mantra?).

Now behold!


Not only have we finished exterior painting, but we've added all the necessary finishing touches like...

...A newly refinished front door with an ornate and shiny door plate/handle...


BEFORE
AFTER


AFTER

....Front porch lights....

...Stylish and chic house numbers...


BEFORE


AFTER


...A mission style chandelier for our cute little side porch...

....Flower beds along the front, complete with seasonal blooms and perennial standards...


BEFORE

AFTER

...A modern roof for our lower back deck...


...A brick landing pad under the street gate entry with stepping stone path...


AFTER


...Stepping stones to connect the side and front porches as well as stones by the man gate in the backyard...

BEFORE
AFTER


...Stained fence and adjacent flower bed...


BEFORE

AFTER


...and last but not least, thanks to Todd's lovely mother, we planted a fabulously southern magnolia tree to grow with us through out the years.

So in summary...

BEFORE

AFTER

We've saved one last project for Thanksgiving weekend: the small, front picket fence.  Todd's family will be coming to celebrate the the weekend with us, and they're looking to get their hands dirty and make their mark on the house.  That's help we can be thankful for!

Monday, October 27, 2014

Older [Houses] Are Beautiful Lovers

I learned this week, in a wash of sawdust and galvanized nails, that old houses are like old people:

In time, they all start to sag.  

No matter how they're made, be it brick or wood or straw, give a house 100 years and you'll be able to see its laugh lines, the creases around its corners.  There's no Botox for houses.  We're lucky that Cleveland is safe and sound for all normal living purposes - he passed inspection with both Dad's and the structural engineer's seal of approval - but our lovable Cleveland does a bit of characteristic sloping around doorways and windows.  We could easily ignore the droop, call it charm, and keep on moving, but in another 100 years, that sloping could mean serious problems.  So - we're doing as any house lover would do and lifting him back up.

If you're looking for every mind-boggling detail, please read my father's blog.  It's a really fantastic description of all our hard work, and he is about ten thousand times more precise than I am!  I only understand about half of what he says, and then I'm forced to try and explain and that never goes too well... (You can find it here: https://www.ownerbuilderbook.com/blogs/users/Mutton-Busting.aspx)

Needless to say, Todd was welcomed home from tour with a whole lot of hard work. Lifting an entire house is no easy feat. (It's also one that makes me incredibly nervous to get my fingers anywhere near the jack they're using. Imagine that pinch!).  First, they started in the basement.  Using the aforementioned jacks, Dad and Todd lifted and installed a new beam to support the den floor.  Then, they put in two permanent post jacks for a little extra support before moving upstairs.

The lams in the den - you can see them snug against the original floor beams, but they're a little shinier and much more orange in color.

In the den, where the sagging around the bay windows was probably the worst, they used laminated veneer lumbar AKA "lams" or "LVLs" across the whole room for additional support and replaced the entryway header with a new beam where dipped.  They also added a few in the kitchen which I think means they had to install 13 total between the two rooms.  Keep in mind, these things are heavy!  Getting them to the ceiling involves a lot of maneuvering weight while on the ladder.  (I couldn't even use the drill while on the ladder outside without getting queasy...)  So den and kitchen?  Check!

Next, they tackled the issue by the front door.  When the original front doors were taken out a few years ago, they were replaced with double arching doors and a new frame that was pretty terribly constructed.  I'm no construction expert, but even I can tell you a nail job where both pieces of lumber are cut at the same place is just a recipe for disaster.  I mean really, didn't those people take physics?  Don't they remember how to draw Force arrows?  To fix the problem of the C- student designing our door frame, Dad and Todd added a new horizontal board to cover that unintended joint and distribute the weight.  They also threw in few shims (those little skinny pieces of wood) to get the height just right while the ceiling was supported by jacks.


If you look closely at the top center of this photo you can see the two different aged 2x4's cut and nailed at the same spot.  The board below is what Todd and Dad added to distribute the weight.  If you look even closer you can see the broken shims splaying out to the sides just above that!

However, just as we began to let the jacks down, the old guy (the house, not dad hehe) started shifting!  Grumble, rumble, moan!  Just like Lyle when he's grumpy, he groaned a minute and then settled back into a slightly less sagging form, breaking the little shims on his way back down (about 3/4 of an inch).

Dad was puzzled.  "It's better..."  You could see him thinking briefly about our budget and how many more LVLs we could afford.  BUT Dad does nothing half-ass, so after maybe 30 seconds of budget weighing, he decided on more LVLs for supporting the ceiling in this room too.  Fine with me!


My two favorites dudes juggling weight as they work to attach a new beam to the ceiling.

After a full few days of nip and tuck, Old Clevie looks almost brand new.  He's still got a few little dimples, but he's surely not going to fall and break a hip.  That's success in my book!

Saturday, October 4, 2014

the empty plate

So, I'm currently in Houston with a good friend of mine, visiting my sister in her recently renovated masterpiece, and while before we arrived all I could think about was designer wedding gowns (we're doing a few much anticipated bridal store visits while I'm here) and cocktails on classy Houston Heights patios, right now the only thing on my mind is, nice work, Mom and Dad.  Kelsey's house is fabulous, and I do mean that in the most glamorous way.  It's the details, folks, the details!  The glass knobs and chrome plates on every door (not to mention the doors themselves!), the custom beadboard paneling the fridge, the eighteen different lighting options for each room, the custom hardware, the perfectly aligned stepping stones to the back gate.  Incredible. 

And everything fits.  There's no sign of afterthought, no lack of attention leading to a fridge sitting out of place at the end of a counter, no awkwardly large gaps between a bathroom vanity and shower stall.  It truly is perfect.

It's so easy to feel underwater in the middle of a renovation.  The details, when tossed and tumbled into some vague ball of yarn are hard to untangle, hard to see, and with time start to weigh on your vision, trapping you into each moment, rendering you unable or maybe just unwilling to think about the final product, to even consider the work you have left. 

Dad has always said that renovation is like eating an elephant - one bite at a time.  And while I do agree...for a dreamer, sometimes it's nice to see an empty plate. 

So, again...NICE WORK MOM AND DAD!   I never thought I'd say this, but I can't wait to get home and get back to work!

the land before [renovation]

So it recently occurred to me that if you're reading this and you're not one of our lovely friends in Nashville then while you may be a fine study on our new fence, you probably have no idea what our house actually looks like.  So when I say things like "no original trim," you're probably thinking, "Oh, it's a little run down."  Well, I'll let the before photos do the talking.  Indulge...


View from the back door to the front.


The top story of our house.  Built into the roof, it has a lower ceiling and fewer windows, but it does still have all the original five panel doors (score!).


 Super fancy railing. 


 The closed off fireplace in the den.  We have since opened this up and the firebox is currently being rebuilt for a see-through gas fixture.  
View from the formal dining room.  Note the pocket doors. SOLD.
Lovely, isn't it?  These photos were taken around the time of of closing. Since then, we've removed the not-so-antique old furniture (also leftover sinks, toilets, buckets of dirt), opened the fire places, and vacuumed a LOT of dirt.


Above is the beginning of the fireplace opening process.  Dad, I must say, has become quite the mason.  He and Todd have also patched and rebuilt a good portion of the brick wall alongside our property.  Not to mention all the tuck pointing along the outside of our house.


Todd's big task this week got him down and dirty, and I do mean literally.  In order to run the water line from the street to the house we had to dig out a 18-inch deep line from the street into the crawl space so lucky Todd got to head into the land of brown recluse for hours of awkward tunneling.  

Wednesday, September 3, 2014

16 Steps for A Painless Painting Experience


Hey there kids, today we're going to talk about the steps of painting.  It goes like this.

Step 1: Scrape.

Step 2: Scrape some more.

Step 3:  Realize that your scraping has taken off all 18 layers of paint in some spots and none in the others.

Step 4: Try to remedy the scraping issue by sanding.

Step 5: Self-diagnose yourself with lead poisoning and call it a day.


Step 6: Replace the rotten wood with fresh, uninhabited pieces.  So long little ant colony!


Step 7: Caulk and patch all the tiny holes, lines, cracks, and joints on the outside of the house.  (That's a lot.

Step 8: Buy more paper towels.  You used them all cleaning up in step 7. 

Step 9: Prime. Curse primer for getting all over already painted surfaces.

Step 10: Paint with chosen color.

Steps 11, 12, 13 and 14:  Repeat step 8.


Step 15:  Stand back and look.


Step 16:  Stop staring, there's more painting to do!