Sunday, November 29, 2015

What [Kitchen] Dreams Are Made Of

Dad has always said: Renovating a house is like eating an elephant. The only way to stay focused and calm is to take it "one bite at a time." And he's right - but sometimes it helps when you have a village eating.

So when cabinets were scheduled to arrive the first week in October while Todd was out touring Europe, we invited my generous and fun uncle Howard up for a visit and some serious cabinet hanging.

I think I've probably told you this a million times, but despite the lure of prebuilt, fully finished kitchen cabinets, we went the route of custom breakdown cabinets in order to get a custom kitchen for a price that did eat up our entire budget. If you have not done a kitchen overhaul before, I will just tell you that our total kitchen expenses were more expensive than every car I've ever owned...combined. And that's the DIY version. Was it worth it? Well, it's pretty obvious that I cannot bake a pie and cook a fancy dinner in my car, so, yes.

Being the not-so-precise and error-prone person that I am, I was banned from helping with cabinet-building, but hey, I'm not complaining. Howard, unlike the Trom clan, has patience, and that goes a long way when you're setting inset doors and installing complicated stove hoods. In just a week, he and Dad were able to set all the cabinets and prepare for counter installation and gas hookup the following week.

The cabinets look gorgeous. And the counters? Divine. It's one hundred percent my dream kitchen, and I'd bet some money that it might be the dream kitchen of quite a few folks that have seen it.

Cabinets after delivery - 11 pallets full!

Pendants going up above the island

Microwave drawer installed into the island

All the cabinets in place and set.


Watching the granite folks bring in the marble slab our 10.5ft by 5ft island (or continent as it has also been called) was one of the more nerve-racking experiences of this whole process. There were five workers bringing in approximately 1000 pounds of marble over a muddy yard and into our house, and according to them, it took longer to bring the slab inside our house than it did to fabricate it.

But - doesn't it look fantastic?

ArabescatoVagli marble slab with a sink cutout for the island

A job well done!


After getting the cabinets and counters installed, it was back to the punch list for the rest of us. Hanging trim is a seemingly continuous process that luckily Todd took on with pride - and frustration. Mom and I followed closely behind the caulk and paint while Dad took on the more complicated finishing touches throughout. 

Someone told me recently that the punch list - the nearly endless list of the little and unrelated tasks that collect towards the tail end of a big project like this - is always deceiving, and that person was right. But  (!) we've finally passed the point of equilibrium with our personal punch lists, and finally, finally, the list of the things to do is growing at a slower rate than the list of things we have done. 

The days are getting shorter, winter is nipping at our toes again, Mom and Dad's eminent departure is just around the corner, and we've scheduled a housewarming party to celebrate the future completion. I've been waiting 17 months to say this. Bittersweet though it may be, the end is near!

Sunday, November 1, 2015

Reduce, Reuse, Recycle

It's pretty pathetic when you have so many updates to share, it's almost unethical to put them all in one blog. Queue the second set of updates...

Here we go...one...two...three...

So I've discovered throughout this process, and I'm sure I've mentioned this before, that I work best when I'm given a wide description of a task and left to figure it out on my own. That's my forte. That's my...only...forte.

Fortunately, Todd is much, much, much better at handling the little menial tasks that often get handed to the two of us by one parent or another. I'm not sure if he's just better at taking direction, less bothered by the mindless stuff because he's so calm and relaxed in general, or just trying to keep a good face because, I mean, these are his in-laws. Regardless of reasoning, Todd just tends to handle tasks across the board with much more composure than I do. Therefore, when I get orders from the big cheese (that would be project manager Mom), I try to pass them off to Todd as much as I can. It's terrible, I know.

BUT I like projects! So when I ran out of flooring to lay and no one had mentioned started working on our "mini mud room" in the back entryway to our house, I jumped right on it despite the frustrated groans of Mom and Dad.

But let's backtrack a bit. During one of our many house clean out mornings [those times when Dad gets so frustrated by all "the shit laying around" that Mom orders an emergency purge and reorganization of tools, materials, and actual shit (packaging from lord knows what, bits of wire insulation, tiny scraps of wood, etc)], Dad noticed the old framed glass panels that lined the sides and top of the original door. A rant that included the words "disgusting," "rotten," and "trash" followed, but I wasn't surprised. He was right after all. The panels were rotten and disgusting. They had rotted away in the frame of the house until they were no longer secure then ripped out and left to decay, eaten away over the years by water, dark, and bugs. But, they were also lovely. And original. So when Dad wasn't looking, I snuck them away into a dark corner of the basement only to be pulled out when the time was right.

That time arose in the months after our wedding when it came time to build our mud "room." I knew I wanted to include the old panels, but the spacing was tight and I had to work around both the alarm panel and the electrical panel. I played around with a few basic structures, but finally settled on one where I would be able to use both remaining pieces of glass paneling.

The panel that would have stood on one side of the original front door was in fairly good shape so I knew I wanted to use that in its original form as some kind of a door. It had about a 3/4 in rotten section along one side, but with Todd's help, I was able to remove that pretty easily with the table saw. I employed Todd's help in the constructing the first tall box, and together, we built our first cabinet! Then I did a little scraping/sanding of the old paint and prepped the door for new paint with the usual caulk and patching.

Laying out the mud room with the first cabinet box built.

Cabinet door sanded and attached!

Plywood shelving in process.
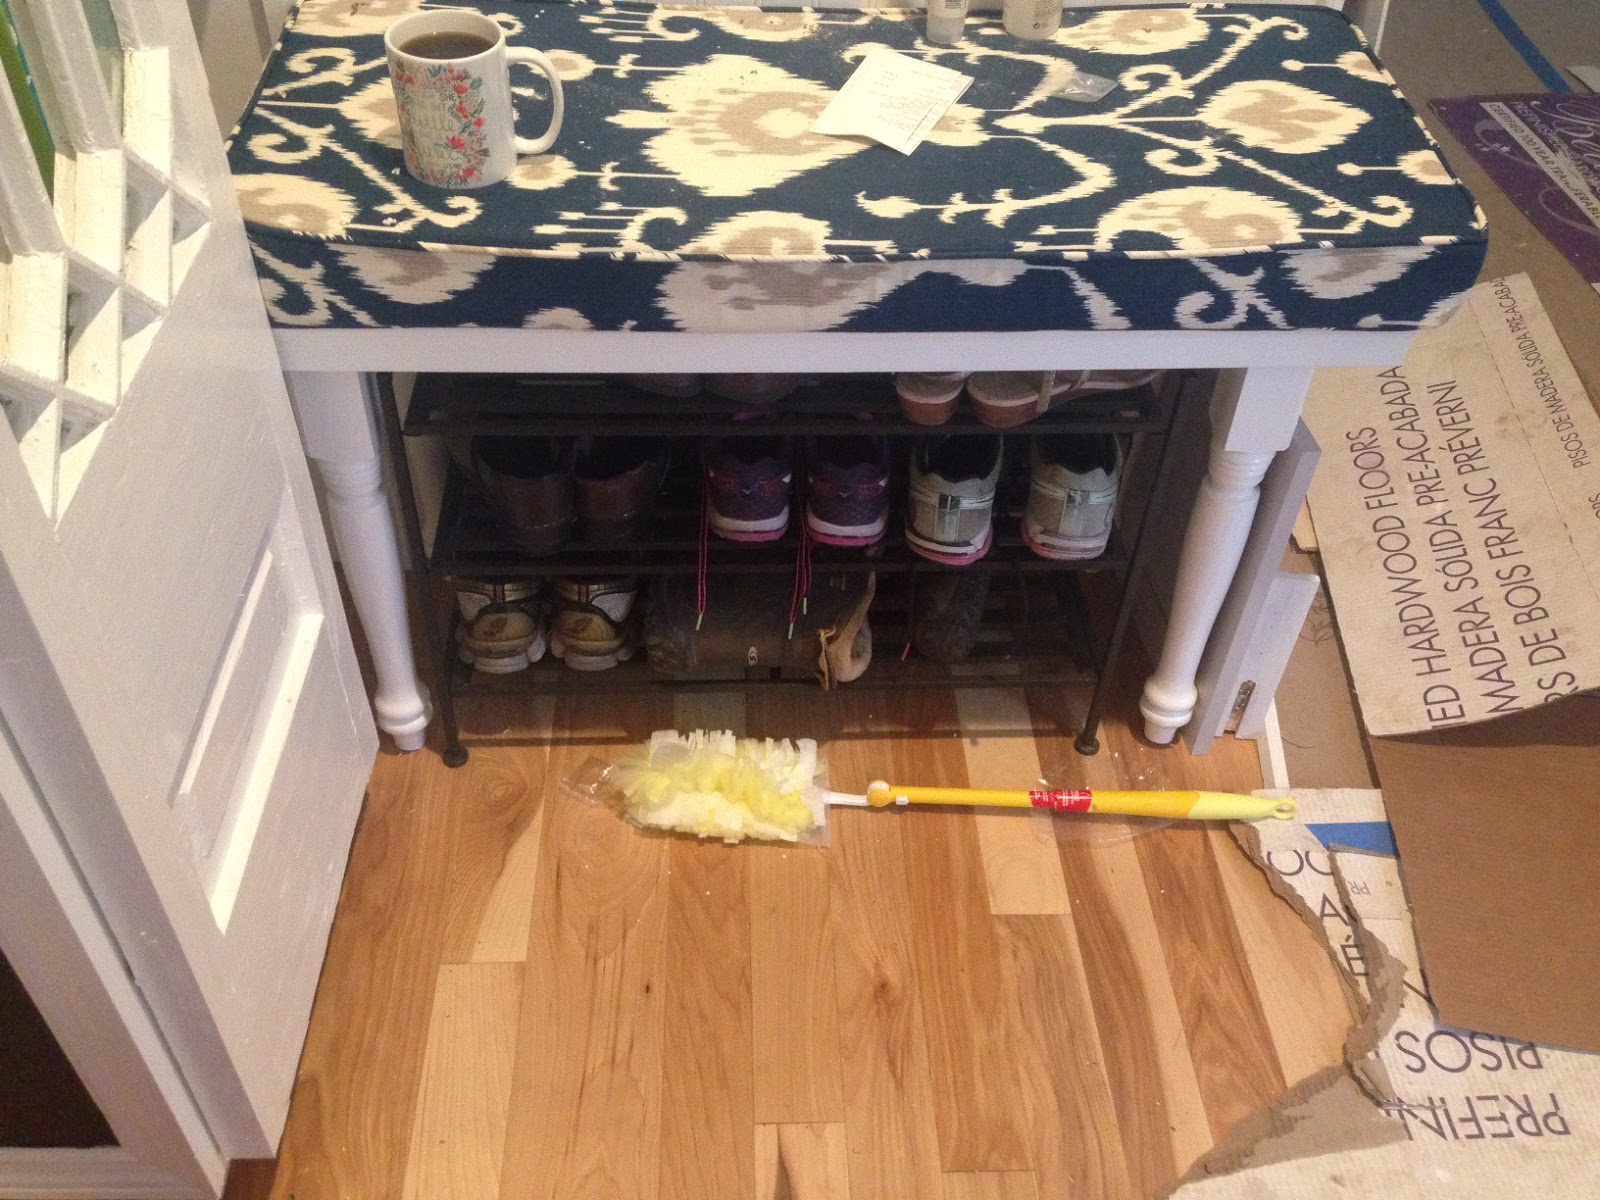
Open shelving beside the tall cabinet was an easy choice to fill the space connect the mud room bench on the perpendicular wall. The bench itself was a pretty simple job - just a piece of plywood trimmed with brick molding and attached to legs.


The real fun started with the top cabinets. I wanted to use the old top door panel, but unlike its matching side, the top panel was nearly completely rotten and held together in many spots by the glass or glazing alone. I knew I would have to cut it down, and I wasn't even sure if it would be salvageable once I did so.

The original glass panel in it's totally rotten shape.

First, I built the largest box I could that could accommodate the alarm box position in the middle of the one wall. Then, I took the old panel outside and determined exactly what parts were rotten and what parts were strong (if any). As it turns out, almost the whole panel was rotten, but I measured two pieces that would work for doors with a good amount of trimming and replacing.


Top cabinet doors constructed from the old front door paneling.
No part of the mud room is perfect. The cabinet doors are all a little beaten up and missing little pieces, the top cabinet isn't quite level to the wall or floor, there are still many layers of paint tucked below the original glasswork, and the whole left side leans a little at the top.

BUT it's got character. And it gave us an excuse to keep those dirty old front door panels we were hoping to save. Not to mention, it's a great place to keep our things.


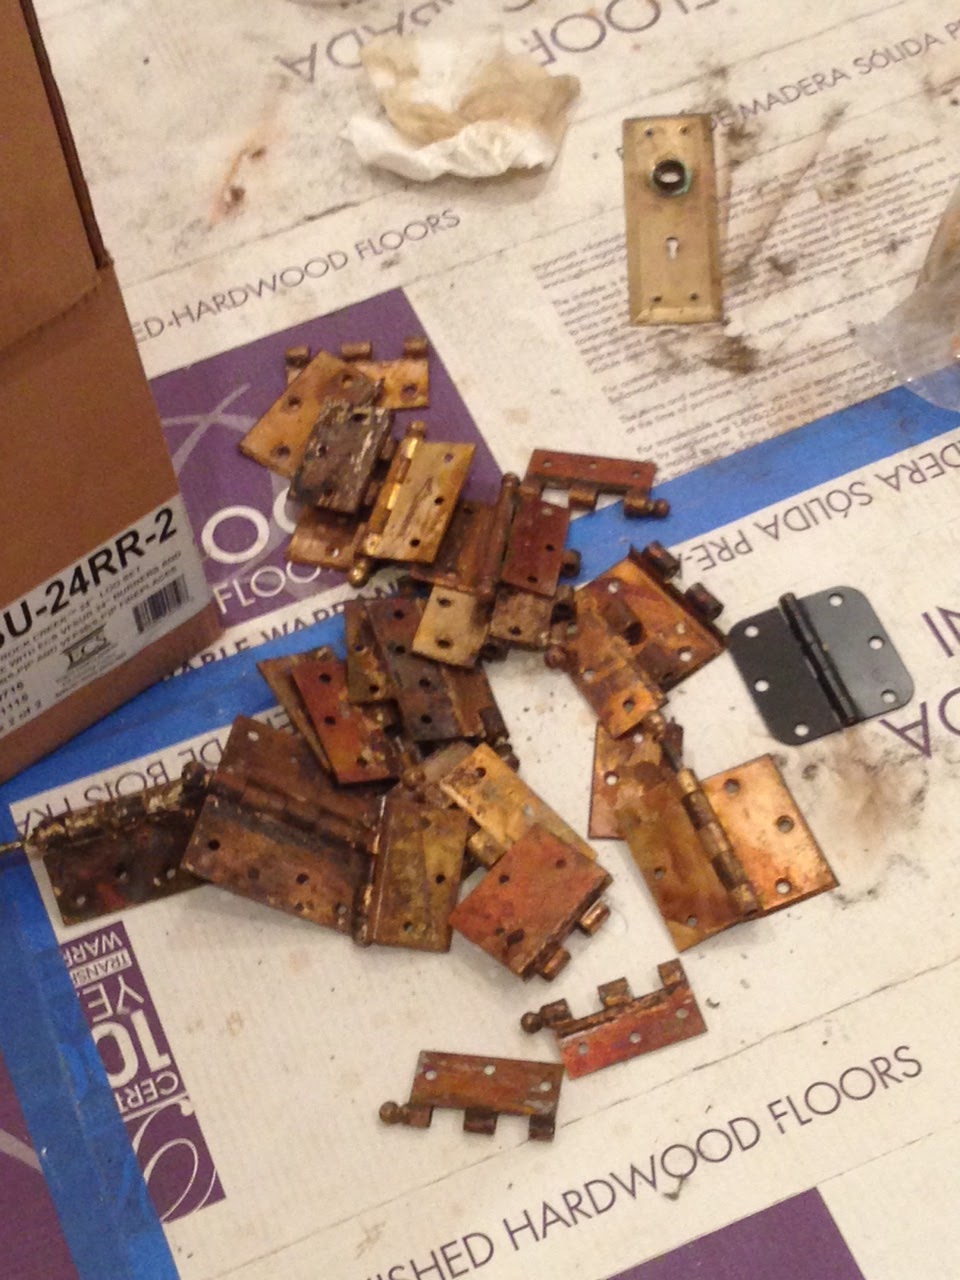
But cabinet doors aren't the only old thing we've been updating. I really wanted to save the original hardware that was left on many of the old five panel doors, and somehow Mom got behind this idea as well. Before we sent the doors for stripping, we removed the hardware. Then Mom took all the pieces home to cook in the crockpot (this helps loosen the paint) before intensely scrubbing every nook and cranny with a wire brush (her favorite tool - remember this??).

Hardware after the paint was removed.


You can see in the photo above that after scraping and sanding the metal to its base, Mom repainted the new pieces in a shiny silver.

I've said it before and I'll say it again - we're learning an unbelievable amount while we work on this house - not just about renovation or construction, but about each other and our family. Sometimes when I'm looking around the house in the evenings - wine in hand, lyle at my heels - admiring the work we've done and pondering the work we have left to do, I can't help but to feel a little overwhelmed still by the tasks ahead. The idea of reaching the ever-distant "completion date" is little like finding the end of a rainbow, but when I'm feeling overwhelmed, I try to look back and see how far we've come. If you need a reminder, check this out.

Teamwork - and hard work - are a beautiful thing.

Tuesday, October 20, 2015

The Big Move-In (And Everything Before)


It's coming to a close. I know, so fast, you're saying, but that's how it happens in these stages. One day you get sheetrock, the next you're moving in your furniture. That's a little exaggerated, of course, seeing as we got sheetrock in June and just moved in two weeks ago, but that's certainly how it feels. 

September was a mad dash of crossing lines out on our own personal punch lists and packing the rental house - me into boxes, Todd into piles - choosing what we would bring upstairs and what we could live the next two months without.

The plan went like this. Sometime in late August, after a long day of work, the four of us were lounging around the patio table out back, likely eating some kind of sausage in a tortilla cooked on our snazzy new charcoal number, when Mom mentioned moving. Up until this point, moving was still an abstraction, some incalculable endpoint of the unknown future, a point that seemed not only far off but dare I say, still impossible. You see, our plan all along had been to move into the house when, and only when, we were entirely finished. It's not like Todd and I hadn't brought it up before. We talked about it often during those long and late night drives home, heading from one messy house to another, but we figured the answer from my parents would always be the same: only when we're finished.

So I would be lying if I said I wasn't shocked. Or that I didn't jump on the idea right away (my mind: $$$$$$ - hello rent savings). Mom figured that if we could completely finish the upstairs of the house, we could easily move in without a useable downstairs. What do you really need everyday besides a bed and a bathroom, really? Wo needs a kitchen? I like takeout. 

It didn't take long before our punch lists were drafted and we were off to the races, or Home Depot as it were, tackling the to-do's big (finally replacing the hardwoods on the stairs) and small (light fixtures, light fixtures, light fixtures) and preparing for our big move. Mom continued with the neverending task of caulking and painting, following closely behind the finishing trimwork and door frames. Dad and Todd set shower glass for the three bathrooms, installed the master sinks, and had the marble installed for the master vanity (woooohooooo!). We finished door frames, completed trimwork, refinished the original doors, and so, so, much more.  

And we made it! With days to spare. September 26 we loaded up the remaining items into our cars and invited our landlord for a walk-through. That night we climbed into our freshly made bed and relaxed - but just for a moment because the work is never finished - because we were finally in!

And now, of course, the photo evidence...

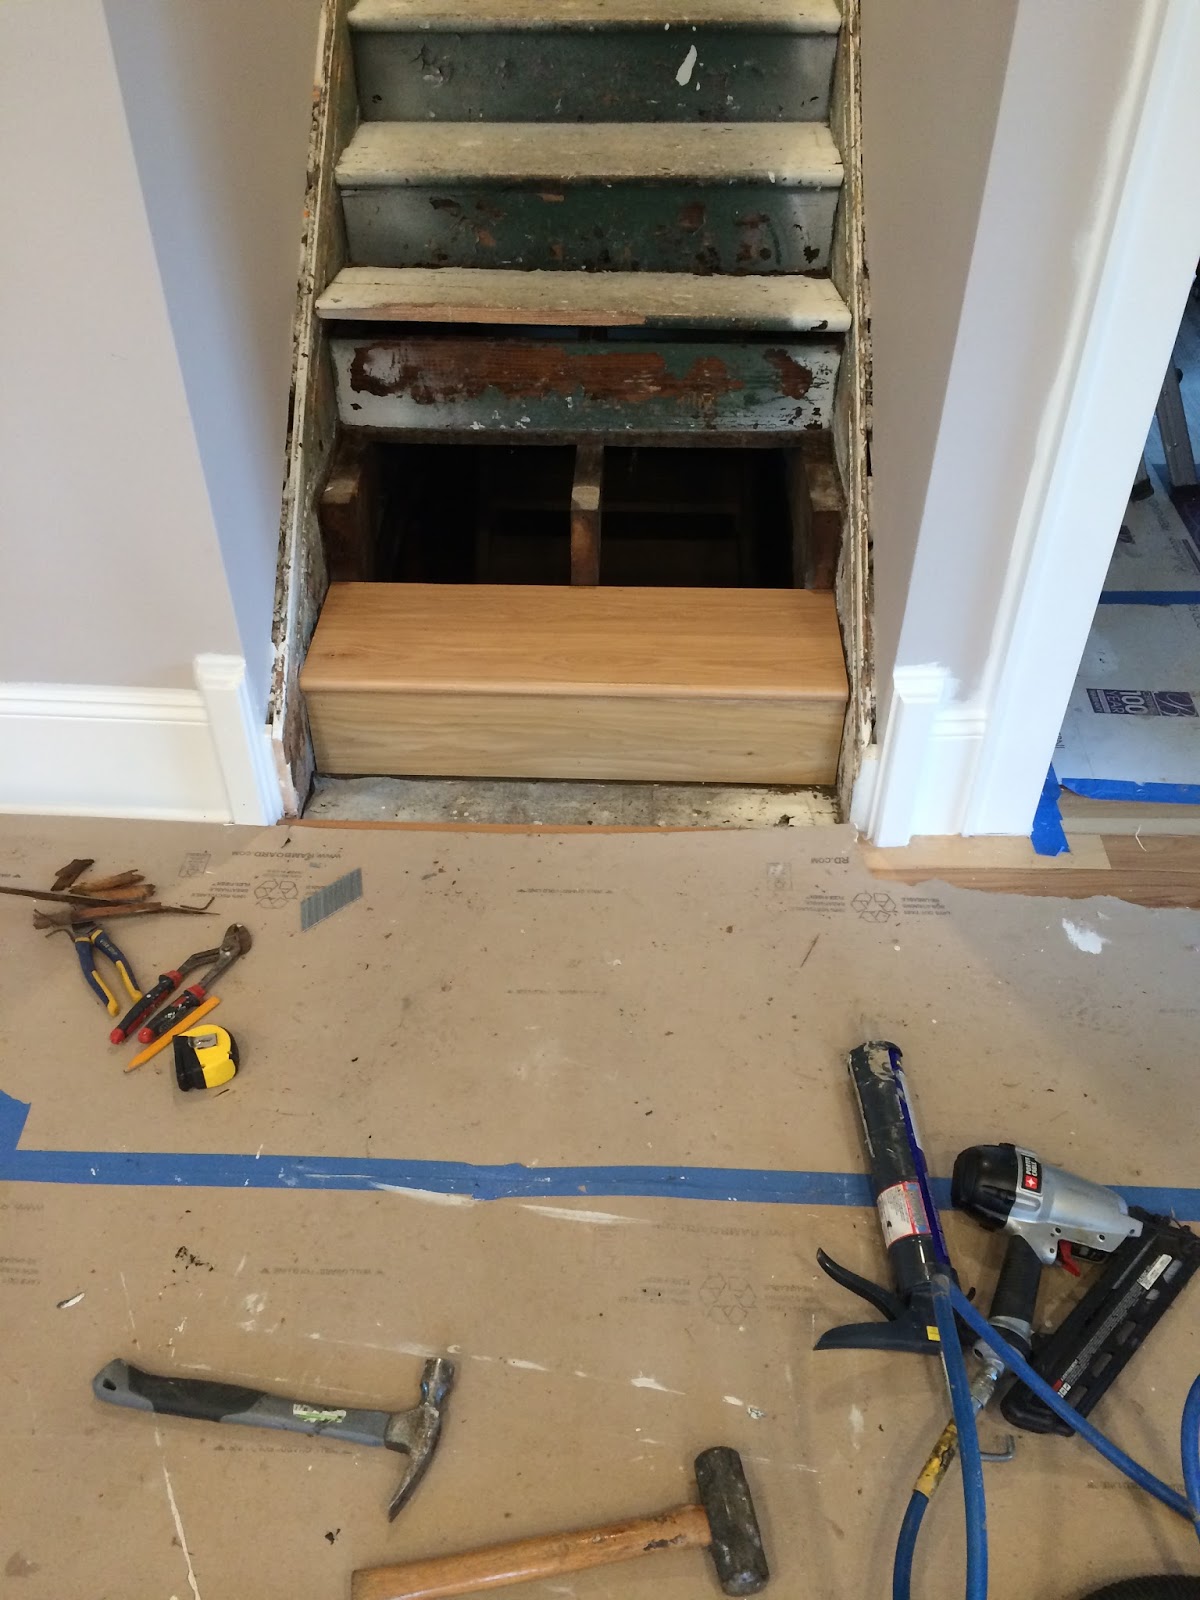
After much debate over keeping and finishing the original stairs, we decided it would be easier and nearly as cheap to replace them. It's funny, we you start a project you have all the grand dreams about preserving every last piece (ie the floors, the stairs), but somewhere around 10 months in, when you all but given up, the easier route becomes decidedly more desirable. So that was that. I fought for the original stairs for about a week and when the time came down to, I opted for new treads. The old floor was covered in paint, cracked, and missing pieces - not to mention it wouldn't match the new floors. We found unfinished hickory treads for a great price and Dad finished them before he and Todd installed them one day.

The unfinished treads


Old stairs


Ripping out the old stairs


We may have replaced the stairs, but the original things we didn't give up on: doors, door frames, and transoms. Last year, Todd met a hygienist at the dental office down the street who renovates old homes in East Nashville with her daughter. Having done a number of old houses in the area, she had collected a wealth of information which so fortunately included the number of a man who dips old doors to remove the finish. He charges a flat $100 a door and the doors come home still needing some sanding and TLC, but we were sold. We saved all the doors we could that would fit existing and new frames and ordered new five panel doors for the others. 

Five panel doors during refinishing.


Some stain and polyurethane turned the old doors into new, preserving the history minus the layers of paint. 

Here, a refinished transom above the bathroom door looks into the master bedroom. You can see the finished five panel door on barn door hardware leading to Todd's closet.

In the past month and a half, I've learned that when big things delivered, they don't get delivered inside. Instead, they get dropped off at the curb of our street where we have to wait....

Shower glass delivery.


The crazy heavy crate of shower glass. Wait...we're having Todd handle glass...?
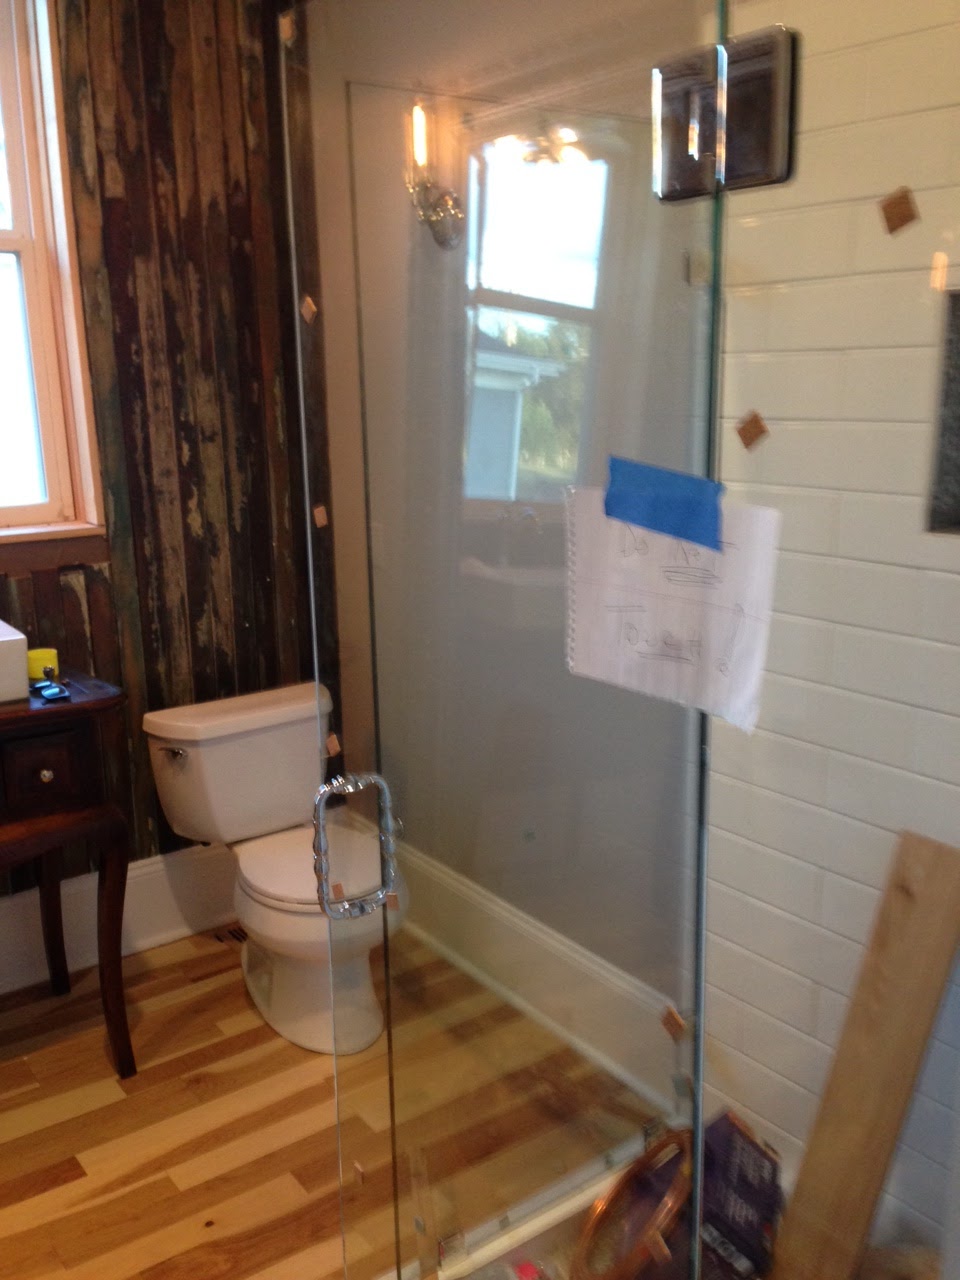
Glass installation in the downstairs bathroom.


Glass install in the master  


For the tubs, we scoured the salvage yard a few times, but decided on new acrylic tubs since we were worried about the weight of two giant cast iron tubs upstairs. Thankfully, this also made them easier to carry up our narrow stairwell.


New clawfoot tubs! 
Moving into the upstairs also meant having a place to put our clothes, so we ordered and installed the storage in both of our closets. Thanks, Kelsey for designing the space!


Until next time...

Sunday, August 23, 2015

Floors, Decor, and and 9 Inch Baseboards

We're back to work. Or rather, we've been back to work. More precisely, we arrived home from our extended destination wedding/mini-moon trip at approximately 2:00am on Saturday morning and begin work again the next day. And since that moment? We've completely installed hardwoods, have added numerous "finishing touches" (ie crystal chandelier oohh ahh), and gotten a pretty good jump on installing all the house's endless amounts of trim. Le sigh.

Needless to say we've been busy.

Todd and I spent the first two weeks of this time completely engrossed in laying the hardwoods. Dad got us going the first weekend, showing us how to use the pneumatic floor nailer, lay the boards correctly, and eliminate gaps. Despite the crazy aches and pains (I am way too young to be this creaky!), I have to say we both enjoyed the challenge. There is something undeniably satisfying about the completely wearing yourself out physically, and those 12 hour days of laying hardwoods definitely fit the bill. Carrying tons of wood upstairs? Check. Hours spent in a continuous kneel-squat-stand rotation that would put any BodyPump class to shame? Check. The endless race from upstairs to downstairs and back just to cut a tiny sliver of wood? Check.

During the second week while Mom and Dad were out of town for work as we began to truly feel what I can only describe as "hardwood hell," we taught ourselves the things they didn't show us. That is, we learned how to take a 5 minute nap, where to find the coolest spots to lie on the floor, how to drive home totally and utterly exhausted, and most importantly, exactly what time of day to take a motivational ice cream break (I tell ya, I'm no better than our food-obsessed dog).

But despite of, or maybe because of, the sheer physical exhaustion, those were two of my favorite weeks. Just like when Todd and I built the deck, my favorite times at the house are those many moments when it's just the two of us working together on a big project and despite the constant urges to swat each other with a piece of prefinished hickory (Todd, if you top-nailed one more time...!), we prevail stronger and accomplished. I sound like a cheesy childhood television show here, but working together is fun! (Queue the brightly colored costumed dancers...)


WAIT! Pause. Do you see that?! I mean, do you SEE THAT?! THERE! Above! It's so strange, it almost looks like Mom (the germaphobe!)  is drinking out of dirty sheetrock mudding pan...

Hard work makes us all a little a lot crazy, I suppose.

Below you can see one of the past month's most crucial developments: the refrigerator! I bought the thing last summer at a Fourth of July sale and it's been a lovely cardboard statue/purse holder/free weight/place to hide from Lyle ever since. Until now! Our first floor laying goal was to lay enough boards to finally hook the thing up, and darn it, we made it pretty quickly. Ahhh the difference cold water/ice cream/beer makes during a day's work...


Guest room floor complete!

Our master bedroom floor

After we finished the kitchen and began covering with cardboard

Hallway done. Our first step before we started breaking off into rooms.
Here you can see the old boards getting covered in a layer of waterproof tar paper and new hickory flooring
Another shot of the old vs. new floor. Bittersweet to cover up that old wood.

Ripping up the particle board we used over the unstable master floor during the reno process. Todd patched and added support where necessary before we could cover with hardwoods. It's still not 100% level, but hey, that's character.


You may be looking at these photos and wondering why exactly we're installing brand new prefinished hickory floors into our 100 year house. Well, as the one who fought long and hard (and eventually lost) to keep at least some of the original floors in our house, I must say, this is a very valid question.

First off, the downstairs floors were beyond repair. In their 103 years of life, they had so many holes and had been sanded too many times that they really weren't usable at all. The upstairs were quite a bit thicker, but still half missing. We priced refinishing and patching with a similar heart pine, but it wasn't anywhere close to budget and because large holes and gaps had developed in even the existing floor, we'd have bigger issues not having any subfloor installed. Imagine the stain or finish dripping through to the sheetrock downstairs or anything else we manged to spill upstairs.

Since we couldn't keep the original history of the house in tact, my next idea was to use rustic reclaimed wood flooring. If you know anything about flooring, you know that the word "reclaimed" is often followed by a series of dollar signs. I called and visited (often multiple times) every reclaimed flooring distributor in Nashville and proceeded to call many others in both nearby and faraway states as well.

Unfortunately, everything that had been remilled was just completely over budget (and our budget was extensive for floors). So, I put my thrifty hat on and did some digging. First I started with craigslist in middle Tenneseee and nearby states to wood flooring from other people's old homes. While I did find a couple potential lots, there was always an issue - the lot wasn't large enough, it cost too much to ship, it's bug-less-ness was too questionable. From there, I dug into ebay searching for and wide for any old flooring I could find. I must note, there really isn't a lot in the world of useable old flooring, so the search was constant and daily...for months. I found a number of contending lots - including the floor from a 100 year old department store in Wisconsin and, believe or not, the old factory flooring the Dan River Textile factory that was just a couple blocks from our old place in Danville before it was torn down - but all the lots were maple. While I liked the idea of how hard maple is (read: resistant to dog toenails and husband shoes), I just couldn't get into the color.

At this point, with enough wood samples to floor a small bathroom, I succumbed to my parents insistence to visit a new flooring store for a change.

Maybe it was the utter frustration after months and months of searching or maybe I was just in a particularly amenable mood, but as soon as I saw the sample of prefinished matte hickory, I started to give. I moaned and groaned a little about the color (it's so light in some parts!), and hated a little how perfectly smooth and fake it looked, but in the end I was sold by its durability with the salesman's reassurance that, "It comes in a 100 year warranty." Sure, it's a little fabricated for my taste, but it's a beautiful wood, AND its actually guaranteed to last this house the next 100 years. Sold.


While Todd and I finished setting the floors, Dad started right into painting and setting trim. Despite his prior complaining about how long and difficult trim is, he is moving rather fast and now has Todd helping on that project as well. He began first with the window trim, nailing a small board to the side of the long 1 by 4 board on all sides of the windows and topping with a piece of decorative moulding. Looks pretty good to me!


Thankfully, I've been working a lot the past week and a half so I haven't had to deal too much with the precisely angled cuts and all that jazz. Really, my job with the trim is caulking. Mom will be the first to tell you, there aren't enough papertowels in the world to make caulking cleaner or more fun. The bygone days of laying floors are surely missed. That's all I will say about that.

Meanwhile, mom's been caulking as well and painting like crazy (are you surprised?). Hanging trim makes such a difference, especially after it's totally caulked and painted.

9.25 inch baseboard - yes!

The beginnings of the dining room board and batten

Now, many months ago, when we first began this project, I read all about classic architectural proportions and their importance in both historical design and in making even a modern space inviting. Essentially, I loved the look of large baseboards and properly proportioned moulding. You see, the ideas are based off the proportions of the human body, and really, is there anything more organic and natural than that (with the exception of a few enhanced women, I mean). Old houses just have that feel to them, and a lot of that is due to the classic proportions. So anyway, as this is obviously the premature dream home, I measured diagrams, I ordered books, I sent my parents article after article explaining the need for at least 10 inch baseboards, telling them that surely that is what would have been in the house originally and describing my desire to restore the house's natural warmth. Of course, larger baseboards seemingly means more money. Imagine my surprise then when Dad found them (or close to them, we had settle for 9.25in) for the same price as a 5 inch baseboard from lumber liquidators. Uh huh.

One of the many lessons I've learned about building is that the big boxes don't always mean big price discounts. We've found most of our best deals from local guys.

Below, you'll see two photos from the dining room. Dad did an awesome job constructing the board and batten. After mom caulked and painted, all the little pieces of wood became one, might I say, lovely room of moulding. I did the gold leaf stencil over a matter of weeks. It's surprisingly easy and quick to do, but if you're planning on doing the same, so stock up on paint before starting! I spent 3 times the amount of time than I did painting running all over town for one ounce containers of gold leafing paint.


Do you recognize that lovely mantel? He was such a lucky find and looks just stunning around the restored fireplace. Can we invite anyone over for a fireside dinner when the temperature drops? 


The mantel below is a bit of an antique/creative combo. The top piece of the mantel come from a 150 year old house in Texas. Mom and Dad had originally purchased the piece for Kelsey's house but her abode lacked the space and so they tugged it faithfully along to Tennessee knowing quite well I would welcome it into my old mantel-less home. We first considered hanging the mantel from the exposed brick in our den, but it was ever so slightly too large so Mom suggested using this beauty to construct our own unique piece for our living room. It fits the grandeur of our formal living room quite well, and the dentil details mirror those found along our roofline. You can see the outcome below. Dad designed and constructed the legs and support for the atrociously heavy piece out of bits of wood. Honestly, I'm taken aback with his design skill, and thinking my mother may have had a hand in this...


You can really see the depth of the paint colors too now that the bright white trim in the place. Soooo lovely.


Ta da! I just had to save that chandelier for last.

Until next time, let's chat! Comment, message me, or stop by for a glass of ice water from our new fridge ;)